들어가며
최근 회사 프로젝트에 다국어 지원을 적용했다.
프로젝트는 React로 개발된 애플리케이션을 webpack으로 번들링하고, 이를 electron으로 실행하여 번들링된 파일을 watch하는 구조다.
일반적인 웹 환경에서는 소셜 공유 및 검색 결과 노출을 소셜 공유 및 검색 결과 노출을 위한 Open Graph 태그 등의 메타 태그를 쉽게 커스터마이징할 수 있습니다.위한 Open Graph 태그 등의 메타 태그를 쉽게 커스터마이징할 수 있습니다.i18next-browser-languagedetector를 사용하여 브라우저의 언어를 감지할 수 있지만, electron 환경에서는 OS의 언어 설정을 직접 감지해야 한다. 이 글에서는 electron 환경에서 OS의 언어를 감지하고 i18next에 적용하는 방법을 소개한다.
react-i18next
먼저 React 환경에 아래와 같이 i18next를 설치한다.
npm i --save-dev react-i18next다음으로 src 폴더 내에 locales 폴더를 생성하고 아래와 같이 구성한다.
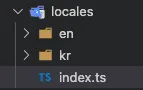
- kr: 한국어 가이드 파일
- en: 영어 가이드 파일
src/locales/kr/common.json
{
  "create": "생성",
  "delete": "삭제"
}
src/locales/en/common.json
{
  "create": "Create",
  "delete": "Delete"
}
이번 프로젝트에서는 페이지별로 다국어 키를 중복해서 사용했다.
이유는 공통화를 하게 되면 매번 key값을 찾으러 해매야 하는 것과 공통화할 항목들이 모호해지는 상황을 겪게 된다.
물론 파일이 커지는 부작용과 중복되는 키가 보기 좋지 않는 단점이 있겠지만 빠른 작업을 필요로 했기 때문에 직관적으로 페이지별로 키를 구분했다.
다국어 파일은 JSON 형식으로 작성하는 것을 추천한다. i18n-ally는 React 파일 내에서 키 값을 매핑하고 수정할 수 있게 해주는 편리한 도구인데, JSON은 수정을 지원하지만 TypeScript는 extension 내에서 수정이 불가능하고 실시간으로 키 값을 인식하지 못하는 문제가 있다.
그리고 모든 언어 파일의 키 값은 동일하게 유지해야 한다.
이제 locales 폴더의 index.ts 파일에 i18next 설정을 추가한다.
src/locales/index.ts
import i18n from "i18next";
import { initReactI18next } from "react-i18next";
import * as localeEn from "./en";
import * as localeKr from "./kr";

export const kr = { ...localeKr };
export const en = { ...localeEn };

i18n.use(initReactI18next).init({
  resources: { en, kr },
  fallbackLng: ["en", "kr"],
  interpolation: { escapeValue: false },
});

export default i18n;
이제 다국어 설정이 완료되었다. 아래와 같이 직접 모듈을 사용하거나
i18n.t("common:created");아래와 같이 라이브러리에서 제공하는 hook을 사용해도 된다.
파일명(예: common)을 지정하지 않아도 해당 키가 있다면 다른 파일에서 찾아 매핑한다.
import { useTranslation } from "react-i18next";
const { t } = useTranslation();

t("common:created");
// 이렇게도 사용 가능
t("created");
electron Language Detector
자 이제 서론에서 얘기했던 electron에서 detector를 설정할 때다.
우리 환경은 React와 electron이 ipc통신을 사용하고 있어서 아래와 같이 컨트롤러를 만들었다.
electron/src/controllers
import { app, BrowserWindow, ipcMain } from "electron";

export default (window: BrowserWindow) => {
  ipcMain.handle("getLocale", async (event, args) => {
    try {
      // 현재 사용자 컴퓨터의 locale을 가져온다.
      const userLocale = app.getLocale();
      return userLocale;
    } catch (error) {
      console.error(error);
      return "en";
    }
  });
};
이제 React에서 이 handle을 호출하는 Detector 모듈을 만든다.
languageDetector.ts
import { electron } from "~/utils/electron";
import { ModuleType } from "i18next";

interface LanguageDetector {
  init: () => void;
  async: boolean;
  type: ModuleType;
  detect: () => string;
  cacheUserLanguage: () => void;
}

const languageDetector: LanguageDetector = {
  type: "languageDetector",
  async: true,
  init: () => {},
  // i18next 내부에서 languageDetector로 정의된 모듈의 detect함수를 실행시켜 반환값을 현재 언어로 설정한다.
  detect: () =>
    electron.ipcRenderer.invoke("getLocale", undefined).then((result: any) => {
      return result;
    }),
  // user의 language를 cache할 조건이 있다면 여기에 정의
  cacheUserLanguage: () => {},
};

export default languageDetector;
마지막으로 i18next에 detector를 추가한다.
src/locales/index.ts
import i18n from "i18next";
import { initReactI18next } from "react-i18next";
import * as localeEn from "./en";
import * as localeKr from "./kr";
import languageDetector from "~/utils/languageDetector";

export const kr = { ...localeKr };
export const en = { ...localeEn };

i18n
  .use(languageDetector)
  .use(initReactI18next)
  .init({
    resources: { en, kr },
    fallbackLng: ["en"],
    interpolation: { escapeValue: false },
  });

export default i18n;
마치며
이상으로 i18next 기본 설정과 electron + React 환경에서 다국어를 설정하는 detector 구현 방법을 살펴봤다.
일반적인 웹 환경과 달리, electron 환경에서는 OS의 locale을 직접 감지해야 하는 경우가 있다. 이 글이 비슷한 상황에서 도움이 되었으면 한다.